Tuesday, 7 September 2021

How to create an Odoo custom module in one command?

While creating a new Odoo custom module, it is a nightmare to do copy & paste, edit & delete files, folders, icons, readme, manifest file etc.

By default Odoo provides a super cool command called scaffold to help you in this situation.

What is Odoo Scaffolding?

Scaffolding is the automated creation of a skeleton structure to simplify bootstrapping (of new modules, in the case of Odoo). While not necessary it avoids the tedium of setting up basic structures and looking up what all starting requirements are.

Scaffolding is available via the odoo-bin scaffold subcommand.

-t <template>

a template directory, files are passed through jinja2 then copied to the destination directory

name

the name of the module to create, may munged in various manners to generate programmatic names (e.g. module directory name, model names, …)

destination

directory in which to create the new module, defaults to the current directory


I have built a few custom module templates as per different categories to manage it.

For example, 

  1. If I want to create a new web related custom module, then I manage it under the web_custom_addons_template module.  
  2. If I want to create a new non-web related custom module, then I manage it under standard_custom_addons_template. 
  3. If I want to create a new customer (project related) custom module, then I manage it under project-code_custom_addons_template
  4. If I want to create a new company (generic) related custom module, then I manage it under company-prefix-custom_addons_template
  5. If I want to create a new OCA related custom module, then I manage it under oca_custom_addons_template


In these template modules, I maintain different manifest files and folders (web/non-web controllers/generic/customer/company). This will save a lot of time to modify/delete files & folders, icons compared to Odoo standard generic custom module template.

Here is command to generate Odoo custom module: 

./odoo-bin scaffold -t source_custom_module_name new_custom_module_name destination_path

where

source_custom_module_name is one of my 4 options. It can vary in your module management.

new_custom_module_name is unique module name based on what I extend workflow

destination_path in which create the new module


I hope you like this article. Share your views. Happy Learning !!!


Reference link: https://docs.huihoo.com/odoo/developer/12.0/reference/cmdline.html#scaffolding

Monday, 29 March 2021

Difference between Invoice Lines and Journal Items in Odoo 14

In account.move has type selection field. If it has value entry then Odoo treats as a Journal entry. And if it has value other then entry, Odoo treats as a Invoice / Bill / Credit Note / Refund.

In account.move.line has type_name computed field, which set value according account.move type value.

Saturday, 19 October 2019

Cisco Anyconnect VPN client for Linux

Cisco AnyConnect Secure Mobility is a collection of features across multiple Cisco products that extends control and security into borderless networks. The products that work together to provide AnyConnect Secure Mobility are the Web Security appliance, adaptive security appliance, and Cisco AnyConnect client.

This blog will help you to setup Cisco AnyConnect Secure Mobility Client and you can connect any VPN from your Linux system.

Here we go:

> Find Anyconnect for Linux. http://ttcit.net/download/linux/
> Go to "Terminal".
> tar -zxvf anyconnect-linux64-4.6.03049-predeploy-k9.tar.gz
> cd anyconnect-linux64-4.6.03049/
> cd vpn/
> sudo ./vpn_install.sh

And you are done.

Now search for "anyconnect" and you will find following:

vpn_anyconnect_cisco_symbol

Open it, enter URL and connect it.

vpn_anyconnect_cisco_connection

Provide username and password. Connect it.

vpn_anyconnect_cisco_username_password

If credentials are valid, you will get connected notification.

vpn_anyconnect_cisco_notification

You can find statistics details for VPN connection.

vpn_anyconnect_cisco_statistics_details

Once you complete your job, disconnect it.

vpn_anyconnect_cisco_statistics_disconnect


If you are window users, here https://www.itechtics.com/cisco-anyconnect-download/ you can find more details.

Reference https://www.cisco.com/c/dam/en/us/td/docs/security/wsa/wsa7-0/user_guide/AnyConnect_Secure_Mobility_SolutionGuide.pdf

I hope you like this article. Share your views. Happy Learning !!!

Monday, 25 September 2017

ImportError: No module named googleapiclient

Recently, I have faced ImportError: No module named googleapiclient and I would like to share knowledge to fix that problem.

Open terminal and run following command to resolve it:

     sudo pip install --upgrade google-api-python-client

Sunday, 30 July 2017

Error: Hash Sum mismatch in GitLab

Recently, I have faced following error during instillation of Gitlab in Ubuntu.

odedra@odedra-Lenovo-Z50-70:~$ sudo apt-get install gitlab-ce
Reading package lists... Done
Building dependency tree      
Reading state information... Done
The following NEW packages will be installed:
  gitlab-ce
0 upgraded, 1 newly installed, 0 to remove and 6 not upgraded.
Need to get 356 MB of archives.
After this operation, 1,102 MB of additional disk space will be used.
Fetched 356 MB in 15s (22.5 MB/s)
E: Failed to fetch https://packages.gitlab.com/gitlab/gitlab-ce/ubuntu/pool/trusty/main/g/gitlab-ce/gitlab-ce_9.4.1-ce.0_amd64.deb  Hash Sum mismatch

E: Unable to fetch some archives, maybe run apt-get update or try with --fix-missing?

Solution:

wget -c https://packages.gitlab.com/gitlab/gitlab-ce/ubuntu/pool/trusty/main/g/gitlab-ce/gitlab-ce_9.4.1-ce.0_amd64.deb

dpkg -i gitlab-ce_9.4.1-ce.0_amd64.deb

Above commands will download package manually and install in system. For more manual package list as per your System requirements.

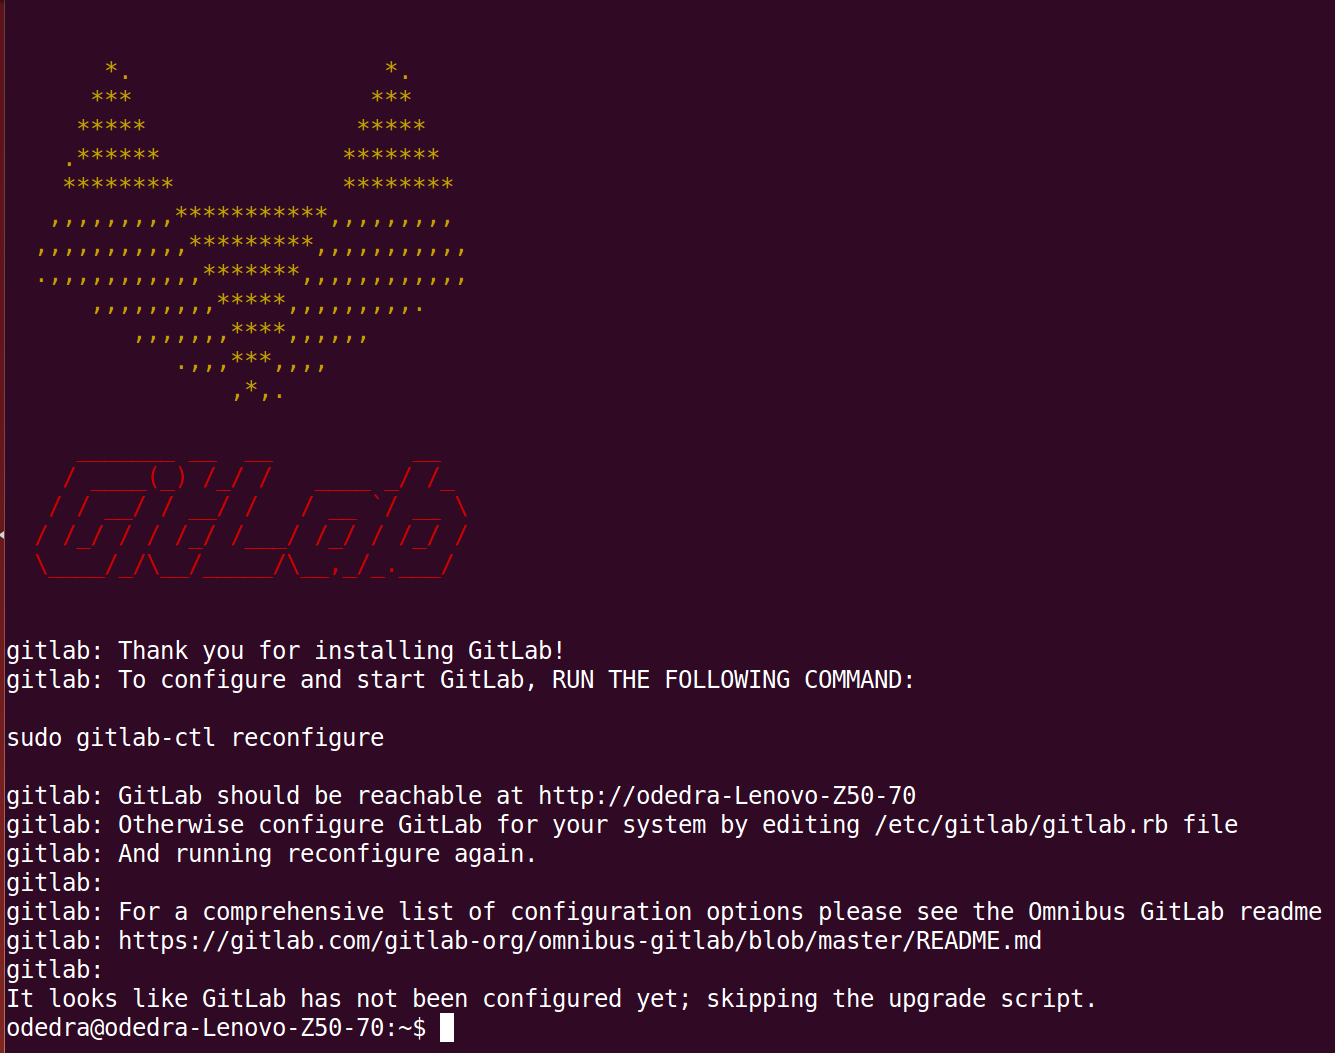
Few screen shots represent successful implementation of Community Edition.


Common Installation problems list and it's solution

How to install GitLab in Ubuntu ?

GitLab is a web-based Git repository manager with wiki and issue tracking features, using an open source license, developed by GitLab Inc.

It has three products.

    1. Community Edition,
    2. Enterprise Edition Starter and
    3. Enterprise Edition Premium.
  
*Community Edition*

1. Install and configure the necessary dependencies

    sudo apt-get install curl openssh-server ca-certificates postfix -y

2. Add the GitLab package server and install the package

    curl -sS https://packages.gitlab.com/install/repositories/gitlab/gitlab-ce/script.deb.sh | sudo bash
    sudo apt-get install gitlab-ce

3. Configure and start GitLab

    sudo gitlab-ctl reconfigure

4. Browse to the hostname and login

    On your first visit, you'll be redirected to a password reset screen to provide the password for the initial administrator account. Enter your desired password and you'll be redirected back to the login screen.

    The default account's username is root. Provide the password you created earlier and login. After login you can change the username if you wish.


*Enterprise Edition*

1. Install and configure the necessary dependencies

    sudo apt-get install curl openssh-server ca-certificates postfix -y

2. Add the GitLab package server and install the package

    curl https://packages.gitlab.com/install/repositories/gitlab/gitlab-ee/script.deb.sh | sudo bash
    sudo apt-get install gitlab-ee

3. Configure and start GitLab

    sudo gitlab-ctl reconfigure

4. Browse to the hostname and login

    On your first visit, you'll be redirected to a password reset screen to provide the password for the initial administrator account. Enter your desired password and you'll be redirected back to the login screen.

    The default account's username is root. Provide the password you created earlier and login. After login you can change the username if you wish.
  
Few screen shots represent successful implementation of Community Edition.


Source reference 

Monday, 27 February 2017

ValueError Expected singleton in Odoo


Expected Singleton:

Class methods required single invoking object (Single Browsable Record) to invoke the method and suppose it will call by multiple invoking objects (Browsable Recordsets) then method is not able to identify for which object it should process, therefore it will raise an error Expected Singleton.

New API decorator is used to define method calling pattern whether methods allows only single object or multiple objects to invoke this method.


For Example:


if self.location_id:     #face ValueError Expected singleton because self contains multiple recordset.
 
    ########

Need to change with following:

for warehouse in self:

    if warehouse.location_id:

        ########


@api.one

This decorator loops automatically on Records of RecordSet for you. Self is redefined as current record

Note:

Caution: the returned value is put in a list. This is not always supported by the web client, e.g. on button action
methods. In that case, you should use @api.multi to decorate your method, and probably call self.ensure_one() in
the method definition.

@api.multi

Self will be the current RecordSet without iteration. It is the default behavior (multiple browsable objects). Methods which returns non premitive type data(list, dictionary, function) must be decorated with @api.multi 

@api.model

This decorator will convert old API calls to decorated function to new API signature. It allows to be polite when
migrating code. Self does not contain any record/recordset in methods which are decorated by this decorator.

So simply call like this

self.env['model_name'].method_name(arguments)

Tuesday, 7 February 2017

ImportError: No module named packaging.version

Recently, I face ImportError: No module named packaging.version  and I would like to share knowledge to fix that problem.

Terminal:

pip --version
pip 1.5.4 from /usr/lib/python2.7/dist-packages (python 2.7)


I am trying to upgrade pip

python -m pip install -U pip

    Traceback (most recent call last):
      File "<string>", line 3, in <module>
      File "setuptools/__init__.py", line 12, in <module>
        import setuptools.version
      File "setuptools/version.py", line 1, in <module>
        import pkg_resources
      File "pkg_resources/__init__.py", line 70, in <module>
        import packaging.version
    ImportError: No module named packaging.version
    Complete output from command python setup.py egg_info:
    Traceback (most recent call last):

  File "<string>", line 3, in <module>

  File "setuptools/__init__.py", line 12, in <module>

    import setuptools.version

  File "setuptools/version.py", line 1, in <module>

    import pkg_resources

  File "pkg_resources/__init__.py", line 70, in <module>

    import packaging.version

ImportError: No module named packaging.version


Solution:

sudo su root

apt-get purge -y python-pip


wget https://bootstrap.pypa.io/get-pip.py


python ./get-pip.py


apt-get install python-pip


Monday, 28 November 2016

Unable to git clone , Failed to connect to github.com port 443: Network is unreachable

Recently, I have encountered following problem. Might be useful for others who face same error.

I have two different Internet service provider. With one ISP, it works fine but with others it fails.

For example:

git clone https://github.com/odoo/odoo.git

It throws me following error:

fatal: unable to access 'https://github.com/odoo/odoo.git': Failed to connect to github.com port 443: Network is unreachable

I have solved with following trick.

ping github.com
PING github.com (192.30.253.112) 56(84) bytes of data.


Add  192.30.253.112 github.com in /etc/hosts file.


Saturday, 12 November 2016

How to create server actions in Odoo 10?

Below is example of server actions in Odoo 8.

<?xml version="1.0" encoding="utf-8" ?>
<odoo>
    <data>
        <record id="action" model="ir.actions.server">
            <field name="name">My Action</field>
            <field name="model_id" ref="model_module_model"/>
            <field name="code">self.action(cr, uid, context=context)</field>
       </record>
    </data>
</odoo>

Following is example for Server actions in Odoo 10.

<?xml version="1.0" encoding="utf-8" ?>
<odoo>

    <data>
        <record id="action" model="ir.actions.server">
            <field name="name">My Action</field>
            <field name="model_id" ref="model_module_model"/>
            <field name="code">
           
            if context.get('active_model') == 'your.module.model' and context.get('active_ids'):
                    action = env['module.model'].browse(context['active_ids']).action()
          
            </field>
       </record>
    </data>
</odoo>


There is no need of self variable to declare server action in Odoo 10.

Tuesday, 8 November 2016

How to activate the developer mode in Odoo version 10?

Developer mode has moved from the user screen to Settings.

Click on link "Active the developer mode" or "Active the developer mode (with assets)"


Active Developer mode


What is different between "Active the developer mode" or "Active the developer mode (with assets)" ?

Active the developer mode :- Used by Administrator User to enables Menus, Fields, kind of security access rights.


Active the developer mode (with assets) :- Used by Odoo developers to track js, css, files, which will helpful to improve further performance.


ModuleNotFoundError: No module named 'psycopg2'

  Odoo 18:  Traceback (most recent call last): File "/home/bodedra/odoo18/demo/src/odoo/./odoo-bin", line 5, in ...