Thursday, 14 August 2025

ModuleNotFoundError: No module named 'psycopg2'

 Odoo 18: 

Traceback (most recent call last):

File "/home/bodedra/odoo18/demo/src/odoo/./odoo-bin", line 5, in <module>

import odoo

File "/home/bodedra/odoo18/demo/src/odoo/odoo/__init__.py", line 49, in <module>

_monkeypatches.patch_all()

File "/home/bodedra/odoo18/demo/src/odoo/odoo/_monkeypatches/__init__.py", line 28, in patch_all

from .lxml import patch_lxml

File "/home/bodedra/odoo18/demo/src/odoo/odoo/_monkeypatches/lxml.py", line 6, in <module>

from odoo.tools import parse_version

File "/home/bodedra/odoo18/demo/src/odoo/odoo/tools/__init__.py", line 10, in <module>

from . import template_inheritance

File "/home/bodedra/odoo18/demo/src/odoo/odoo/tools/template_inheritance.py", line 9, in <module>

from odoo.tools.translate import LazyTranslate

File "/home/bodedra/odoo18/demo/src/odoo/odoo/tools/translate.py", line 35, in <module>

from psycopg2.extras import Json

ModuleNotFoundError: No module named 'psycopg2'


Resolved with

pip3.12 install psycopg2-binary


Friday, 25 July 2025

How to install python3.12 in Linux?

First we have to add repository source code so open terminal and run following command:


sudo add-apt-repository ppa:deadsnakes/ppa


Next update the apt library:


sudo apt update


Finally, install python3.12 in your Linux system:


sudo apt install python3.12


Wednesday, 1 November 2023

ImportError: cannot import name 'utils' from 'PyPDF2'

Odoo 15:

Traceback (most recent call last):
  File "/usr/local/lib/python3.8/threading.py", line 932, in _bootstrap_inner
    self.run()
  File "/usr/local/lib/python3.8/threading.py", line 870, in run
    self._target(*self._args, **self._kwargs)
  File "/home/bodedra/odoo15/src/odoo/odoo/service/server.py", line 473, in target
    self.cron_thread(i)
  File "/home/bodedra/odoo15/src/odoo/odoo/service/server.py", line 429, in cron_thread
    from odoo.addons.base.models.ir_cron import ir_cron
  File "/home/bodedra/odoo15/src/odoo/odoo/addons/base/__init__.py", line 5, in <module>
    from . import models
  File "/home/bodedra/odoo15/src/odoo/odoo/addons/base/models/__init__.py", line 13, in <module>
    from . import ir_actions_report
  File "/home/bodedra/odoo15/src/odoo/odoo/addons/base/models/ir_actions_report.py", line 26, in <module>
    from PyPDF2 import PdfFileWriter, PdfFileReader, utils
ImportError: cannot import name 'utils' from 'PyPDF2' (/home/bodedra/odoo15/src/venv/lib/python3.8/site-packages/pypdf2-3.0.1-py3.8.egg/PyPDF2/__init__.py) 

Resolved with

pip install PyPDF2==1.26.0

Sunday, 29 January 2023

Ubuntu 22.04 External display not detected

I have recently encounter problem in connect external display/monitor in my Ubuntu system.

Here is problem description:

I have recently install 22.04 Ubuntu OS and I lost external monitor connectivity. I have tried few things but stuck.

MSI Laptop with LG monitor
intel + nvidia
OS: Ubuntu 22.04


**xrandr**:

HDMI-1-0 disconnected (normal left inverted right x axis y axis)
    Identifier: 0x202
    Timestamp:  18422
    Subpixel:   unknown
    Clones:   
    CRTCs:      4 5 6 7
    Transform:  1.000000 0.000000 0.000000
                0.000000 1.000000 0.000000
                0.000000 0.000000 1.000000
               filter:
    PRIME Synchronization: 1
        supported: 0, 1
    CTM: 0 1 0 0 0 0 0 0 0 1 0 0 0 0 0 0
        0 1
    CscMatrix: 65536 0 0 0 0 65536 0 0 0 0 65536 0
    BorderDimensions: 4
        supported: 4
    Border: 0 0 0 0
        range: (0, 65535)
    SignalFormat: TMDS
        supported: TMDS
    ConnectorType: HDMI
    ConnectorNumber: 0
    _ConnectorLocation: 0
    non-desktop: 0
        supported: 0, 1

I turn off *wayland* setting and turn on *X11* And whenever I go to *Settings > About* my laptop freeze.

Additionally, I don't see display layout to setup monitor. I have Dell Dock and tried with DP1 and HDMI cables but didn't work.

I tried all possible solution, purge and install nvidia drivers, ubuntu-drivers autoinstall, OS re-install with safe graphics.


**EDIT**

I have multiple drivers from the Additional driver window. I tried green highlighted drivers.


**What I did?**

  • Select drivers and install it. Click on restart now button.
  • After restart, open a terminal and run command `sudo ubuntu-drivers autoinstall`. Afterwards, reboot.
  • Go to Settings > Display. No effect. Same window as previous.


SOLUTION:

I have tried multiple tricks to find a solution inside the Linux system. Afterwards, I have tried to find a solution for the Dock driver connector to display my external monitor. And it works, here what I have done:

  • Download external Nvidia drivers https://www.nvidia.com/download/index.aspx
  • Go to terminal and run downloaded file from above link: `sudo ./filename.run` In my case, I did `sudo ./NVIDIA-Linux-x86_64-525.85.05.run`
  • Download Ubuntu drivers for Dell Dock from https://www.synaptics.com/products/displaylink-graphics/downloads/ubuntu
  • Open downloaded folder. It has a .run file. In my case, `sudo ./displaylink-driver-5.6.1-59.184.run`
  • sudo reboot
  • Additionally, I had to install `sudo apt-get install evdi-dkms`
  • Afterwards, I got an external display (LG), Dell Dock with MSI laptop.


Tuesday, 7 September 2021

How to create an Odoo custom module in one command?

While creating a new Odoo custom module, it is a nightmare to do copy & paste, edit & delete files, folders, icons, readme, manifest file etc.

By default Odoo provides a super cool command called scaffold to help you in this situation.

What is Odoo Scaffolding?

Scaffolding is the automated creation of a skeleton structure to simplify bootstrapping (of new modules, in the case of Odoo). While not necessary it avoids the tedium of setting up basic structures and looking up what all starting requirements are.

Scaffolding is available via the odoo-bin scaffold subcommand.

-t <template>

a template directory, files are passed through jinja2 then copied to the destination directory

name

the name of the module to create, may munged in various manners to generate programmatic names (e.g. module directory name, model names, …)

destination

directory in which to create the new module, defaults to the current directory


I have built a few custom module templates as per different categories to manage it.

For example, 

  1. If I want to create a new web related custom module, then I manage it under the web_custom_addons_template module.  
  2. If I want to create a new non-web related custom module, then I manage it under standard_custom_addons_template. 
  3. If I want to create a new customer (project related) custom module, then I manage it under project-code_custom_addons_template
  4. If I want to create a new company (generic) related custom module, then I manage it under company-prefix-custom_addons_template
  5. If I want to create a new OCA related custom module, then I manage it under oca_custom_addons_template


In these template modules, I maintain different manifest files and folders (web/non-web controllers/generic/customer/company). This will save a lot of time to modify/delete files & folders, icons compared to Odoo standard generic custom module template.

Here is command to generate Odoo custom module: 

./odoo-bin scaffold -t source_custom_module_name new_custom_module_name destination_path

where

source_custom_module_name is one of my 4 options. It can vary in your module management.

new_custom_module_name is unique module name based on what I extend workflow

destination_path in which create the new module


I hope you like this article. Share your views. Happy Learning !!!


Reference link: https://docs.huihoo.com/odoo/developer/12.0/reference/cmdline.html#scaffolding

Monday, 29 March 2021

Difference between Invoice Lines and Journal Items in Odoo 14

In account.move has type selection field. If it has value entry then Odoo treats as a Journal entry. And if it has value other then entry, Odoo treats as a Invoice / Bill / Credit Note / Refund.

In account.move.line has type_name computed field, which set value according account.move type value.

Saturday, 19 October 2019

Cisco Anyconnect VPN client for Linux

Cisco AnyConnect Secure Mobility is a collection of features across multiple Cisco products that extends control and security into borderless networks. The products that work together to provide AnyConnect Secure Mobility are the Web Security appliance, adaptive security appliance, and Cisco AnyConnect client.

This blog will help you to setup Cisco AnyConnect Secure Mobility Client and you can connect any VPN from your Linux system.

Here we go:

> Find Anyconnect for Linux. http://ttcit.net/download/linux/
> Go to "Terminal".
> tar -zxvf anyconnect-linux64-4.6.03049-predeploy-k9.tar.gz
> cd anyconnect-linux64-4.6.03049/
> cd vpn/
> sudo ./vpn_install.sh

And you are done.

Now search for "anyconnect" and you will find following:

vpn_anyconnect_cisco_symbol

Open it, enter URL and connect it.

vpn_anyconnect_cisco_connection

Provide username and password. Connect it.

vpn_anyconnect_cisco_username_password

If credentials are valid, you will get connected notification.

vpn_anyconnect_cisco_notification

You can find statistics details for VPN connection.

vpn_anyconnect_cisco_statistics_details

Once you complete your job, disconnect it.

vpn_anyconnect_cisco_statistics_disconnect


If you are window users, here https://www.itechtics.com/cisco-anyconnect-download/ you can find more details.

Reference https://www.cisco.com/c/dam/en/us/td/docs/security/wsa/wsa7-0/user_guide/AnyConnect_Secure_Mobility_SolutionGuide.pdf

I hope you like this article. Share your views. Happy Learning !!!

Monday, 25 September 2017

ImportError: No module named googleapiclient

Recently, I have faced ImportError: No module named googleapiclient and I would like to share knowledge to fix that problem.

Open terminal and run following command to resolve it:

     sudo pip install --upgrade google-api-python-client

Sunday, 30 July 2017

Error: Hash Sum mismatch in GitLab

Recently, I have faced following error during instillation of Gitlab in Ubuntu.

odedra@odedra-Lenovo-Z50-70:~$ sudo apt-get install gitlab-ce
Reading package lists... Done
Building dependency tree      
Reading state information... Done
The following NEW packages will be installed:
  gitlab-ce
0 upgraded, 1 newly installed, 0 to remove and 6 not upgraded.
Need to get 356 MB of archives.
After this operation, 1,102 MB of additional disk space will be used.
Fetched 356 MB in 15s (22.5 MB/s)
E: Failed to fetch https://packages.gitlab.com/gitlab/gitlab-ce/ubuntu/pool/trusty/main/g/gitlab-ce/gitlab-ce_9.4.1-ce.0_amd64.deb  Hash Sum mismatch

E: Unable to fetch some archives, maybe run apt-get update or try with --fix-missing?

Solution:

wget -c https://packages.gitlab.com/gitlab/gitlab-ce/ubuntu/pool/trusty/main/g/gitlab-ce/gitlab-ce_9.4.1-ce.0_amd64.deb

dpkg -i gitlab-ce_9.4.1-ce.0_amd64.deb

Above commands will download package manually and install in system. For more manual package list as per your System requirements.

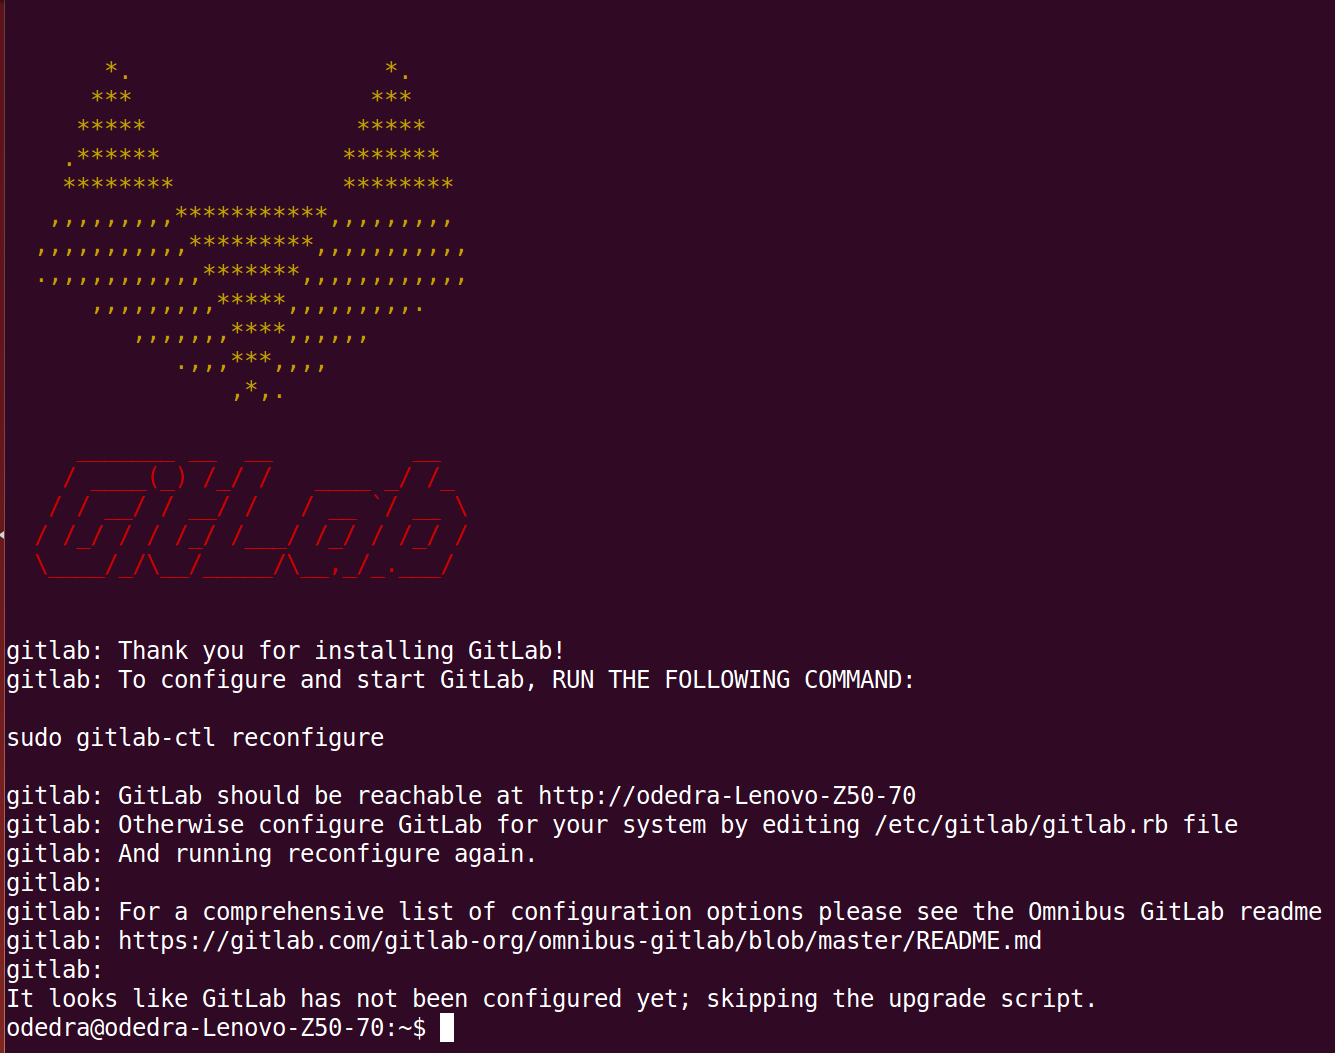
Few screen shots represent successful implementation of Community Edition.


Common Installation problems list and it's solution

How to install GitLab in Ubuntu ?

GitLab is a web-based Git repository manager with wiki and issue tracking features, using an open source license, developed by GitLab Inc.

It has three products.

    1. Community Edition,
    2. Enterprise Edition Starter and
    3. Enterprise Edition Premium.
  
*Community Edition*

1. Install and configure the necessary dependencies

    sudo apt-get install curl openssh-server ca-certificates postfix -y

2. Add the GitLab package server and install the package

    curl -sS https://packages.gitlab.com/install/repositories/gitlab/gitlab-ce/script.deb.sh | sudo bash
    sudo apt-get install gitlab-ce

3. Configure and start GitLab

    sudo gitlab-ctl reconfigure

4. Browse to the hostname and login

    On your first visit, you'll be redirected to a password reset screen to provide the password for the initial administrator account. Enter your desired password and you'll be redirected back to the login screen.

    The default account's username is root. Provide the password you created earlier and login. After login you can change the username if you wish.


*Enterprise Edition*

1. Install and configure the necessary dependencies

    sudo apt-get install curl openssh-server ca-certificates postfix -y

2. Add the GitLab package server and install the package

    curl https://packages.gitlab.com/install/repositories/gitlab/gitlab-ee/script.deb.sh | sudo bash
    sudo apt-get install gitlab-ee

3. Configure and start GitLab

    sudo gitlab-ctl reconfigure

4. Browse to the hostname and login

    On your first visit, you'll be redirected to a password reset screen to provide the password for the initial administrator account. Enter your desired password and you'll be redirected back to the login screen.

    The default account's username is root. Provide the password you created earlier and login. After login you can change the username if you wish.
  
Few screen shots represent successful implementation of Community Edition.


Source reference 

Monday, 27 February 2017

ValueError Expected singleton in Odoo


Expected Singleton:

Class methods required single invoking object (Single Browsable Record) to invoke the method and suppose it will call by multiple invoking objects (Browsable Recordsets) then method is not able to identify for which object it should process, therefore it will raise an error Expected Singleton.

New API decorator is used to define method calling pattern whether methods allows only single object or multiple objects to invoke this method.


For Example:


if self.location_id:     #face ValueError Expected singleton because self contains multiple recordset.
 
    ########

Need to change with following:

for warehouse in self:

    if warehouse.location_id:

        ########


@api.one

This decorator loops automatically on Records of RecordSet for you. Self is redefined as current record

Note:

Caution: the returned value is put in a list. This is not always supported by the web client, e.g. on button action
methods. In that case, you should use @api.multi to decorate your method, and probably call self.ensure_one() in
the method definition.

@api.multi

Self will be the current RecordSet without iteration. It is the default behavior (multiple browsable objects). Methods which returns non premitive type data(list, dictionary, function) must be decorated with @api.multi 

@api.model

This decorator will convert old API calls to decorated function to new API signature. It allows to be polite when
migrating code. Self does not contain any record/recordset in methods which are decorated by this decorator.

So simply call like this

self.env['model_name'].method_name(arguments)

Tuesday, 7 February 2017

ImportError: No module named packaging.version

Recently, I face ImportError: No module named packaging.version  and I would like to share knowledge to fix that problem.

Terminal:

pip --version
pip 1.5.4 from /usr/lib/python2.7/dist-packages (python 2.7)


I am trying to upgrade pip

python -m pip install -U pip

    Traceback (most recent call last):
      File "<string>", line 3, in <module>
      File "setuptools/__init__.py", line 12, in <module>
        import setuptools.version
      File "setuptools/version.py", line 1, in <module>
        import pkg_resources
      File "pkg_resources/__init__.py", line 70, in <module>
        import packaging.version
    ImportError: No module named packaging.version
    Complete output from command python setup.py egg_info:
    Traceback (most recent call last):

  File "<string>", line 3, in <module>

  File "setuptools/__init__.py", line 12, in <module>

    import setuptools.version

  File "setuptools/version.py", line 1, in <module>

    import pkg_resources

  File "pkg_resources/__init__.py", line 70, in <module>

    import packaging.version

ImportError: No module named packaging.version


Solution:

sudo su root

apt-get purge -y python-pip


wget https://bootstrap.pypa.io/get-pip.py


python ./get-pip.py


apt-get install python-pip


Monday, 28 November 2016

Unable to git clone , Failed to connect to github.com port 443: Network is unreachable

Recently, I have encountered following problem. Might be useful for others who face same error.

I have two different Internet service provider. With one ISP, it works fine but with others it fails.

For example:

git clone https://github.com/odoo/odoo.git

It throws me following error:

fatal: unable to access 'https://github.com/odoo/odoo.git': Failed to connect to github.com port 443: Network is unreachable

I have solved with following trick.

ping github.com
PING github.com (192.30.253.112) 56(84) bytes of data.


Add  192.30.253.112 github.com in /etc/hosts file.


Saturday, 12 November 2016

How to create server actions in Odoo 10?

Below is example of server actions in Odoo 8.

<?xml version="1.0" encoding="utf-8" ?>
<odoo>
    <data>
        <record id="action" model="ir.actions.server">
            <field name="name">My Action</field>
            <field name="model_id" ref="model_module_model"/>
            <field name="code">self.action(cr, uid, context=context)</field>
       </record>
    </data>
</odoo>

Following is example for Server actions in Odoo 10.

<?xml version="1.0" encoding="utf-8" ?>
<odoo>

    <data>
        <record id="action" model="ir.actions.server">
            <field name="name">My Action</field>
            <field name="model_id" ref="model_module_model"/>
            <field name="code">
           
            if context.get('active_model') == 'your.module.model' and context.get('active_ids'):
                    action = env['module.model'].browse(context['active_ids']).action()
          
            </field>
       </record>
    </data>
</odoo>


There is no need of self variable to declare server action in Odoo 10.

Tuesday, 8 November 2016

How to activate the developer mode in Odoo version 10?

Developer mode has moved from the user screen to Settings.

Click on link "Active the developer mode" or "Active the developer mode (with assets)"


Active Developer mode


What is different between "Active the developer mode" or "Active the developer mode (with assets)" ?

Active the developer mode :- Used by Administrator User to enables Menus, Fields, kind of security access rights.


Active the developer mode (with assets) :- Used by Odoo developers to track js, css, files, which will helpful to improve further performance.


Thursday, 7 July 2016

Error when override orm write method in Odoo 8 or 9

If you try override write method with following new API:

         @api.model
         def write(self, vals):
            ....
            return super(MyClass, self).write(vals)

You will see the following error:

        Traceback (most recent call last):
          File "/opt/odoo/odoo-server/openerp/http.py", line 530, in _handle_exception
            return super(JsonRequest, self)._handle_exception(exception)
          File "/opt/odoo/odoo-server/openerp/http.py", line 567, in dispatch
            result = self._call_function(**self.params)
          File "/opt/odoo/odoo-server/openerp/http.py", line 303, in _call_function
            return checked_call(self.db, *args, **kwargs)
          File "/opt/odoo/odoo-server/openerp/service/model.py", line 113, in wrapper
            return f(dbname, *args, **kwargs)
          File "/opt/odoo/odoo-server/openerp/http.py", line 300, in checked_call
            return self.endpoint(*a, **kw)
          File "/opt/odoo/odoo-server/openerp/http.py", line 796, in __call__
            return self.method(*args, **kw)
          File "/opt/odoo/odoo-server/openerp/http.py", line 396, in response_wrap
            response = f(*args, **kw)
          File "/opt/odoo/odoo-server/addons/web/controllers/main.py", line 939, in call_button
            action = self._call_kw(model, method, args, {})
          File "/opt/odoo/odoo-server/addons/web/controllers/main.py", line 927, in _call_kw
            return getattr(request.registry.get(model), method)(request.cr, request.uid, *args, **kwargs)
          File "/opt/odoo/odoo-server/openerp/api.py", line 241, in wrapper
            return old_api(self, *args, **kwargs)
          File "/opt/odoo/odoo-server/openerp/api.py", line 239, in wrapper
            return new_api(self, *args, **kwargs)
        TypeError: write() got an unexpected keyword argument 'context'

Question: How to resolved mentioned error ?

Solution:

The method write should be decorated with decorator @api.multi. The mapping new API → old API defined by @api.model is inadequate (argument ids is missing).

Try with following code:

         @api.multi
         def write(self, vals):
            ....
            return super(MyClass, self).write(vals)

For more details Odoo documentation 

Wednesday, 8 June 2016

How to keep track of employee expenses?

Employee expenses are charges incurred on behalf of the company. The company then reimburses these expenses to the employee. The receipts encountered most frequently are:


  • car travel, reimbursed per unit of distance (mile or kilometer),
  • subsistence expenses, reimbursed based on the bill,
  • other purchases, such as stationery and books, destined for the company but carried out by the employee.

The expenses workflow


 * Record a new expense

Every employee of the company can register their expenses from Expenses application ‣ My Expenses. The workflow for personal expenses work that way:
  1. an employee record his expense, and submit it to the manager
  2. the manager approve or refuse the expense
  3. the accountant post journal entries
  4. the company reimburse the employee expense (the employee is like a vendor, with a payable account)
  5. if the expense is linked to an analytic account, the company can reinvoice the customer
For every expense, the employee should record at least:
  • a description: that should include the reference of the ticket / bill
  • a product: the expense type
  • a price (e.g. hotel) or a quantity (e.g. reimburse km if travel with his own car)
Depending of the policy of the company, he might have to attach a scan or a photo of the expense. To do that, just a write a message in the bottom of the expense with the scan of the bill/ticket in attachment.

If the expense is linked to a customer project, you should not forget to set an analytic account, related to the customer project or sale order (you might have to activate analytic accounts in the accounting settings to get this feature).
Once the expense is fully recorded, the employee has to click the button Submit to Manager.

In some companies, employees should submit their expenses grouped at the end of the month, or at the end of a business trip.

An employee can submit all his expenses in batch, using the Submit Expenses action from the list view of expenses, or the small icons in the list view.

* Validation by the manager

Managers should receive an email for every expense to be approved (the manager of an employee is defined on the employee form). They can use the menu To Approve to check all expenses that are waiting for validation.
The manager can:
  • discuss on an expense to ask for more information (e.g., if a scan of the bill is missing);
  • reject an expense;
  • approve an expense.


* Control by the accountant

Then, all expenses that have been validated by the manager should be posted by the accountant. When an expense is posted, the related journal entry is created and posted in your accounting.
If the accountant wants to create only one journal entry for a batch of expenses, he can post expenses in batch from the list view of all expenses.


* Reinvoice expenses to customers

If the expense was linked to an analytic account related to a sale order, the sale order has a new line related to the expense. This line is not invoiced to the customer yet and will be included in the next invoice that will be send to the customer (charge travel and accommodations on a customer project)
To invoice the customer, just click on the invoice button on his sale order. (or it will be done automatically at the end of the week/month if you invoice all your orders in batch)


* Reimburse the employee

If the expense was paid with the employee's own money, the company should reimburse the employee. In such a case, the employee will appear in the aged payable balance until the company reimburse him his expenses.
All you have to do is to create a payment to this employee for the amount due.


Youtube video 


Reference link

Wednesday, 11 May 2016

How to find last day of current month and first day of current month in Python ?

For finding last day of current month, we need to use calendar and datetime python libraries.

Following is an example of it.

>>> import calendar
>>> import datetime

>>> calendar.mdays[datetime.date.today().month]
31

>>> datetime.datetime.today().replace(day=1)
It will replace today's date with starting date of month.

I hope you like this article. Share your views to improve content. Happy Learning !!!

Friday, 18 December 2015

Login in Odoo with Google Acoount

This article will help us to login In Odoo with Google account.

If you have Google Apps then you probably want to allow your Odoo users to login with their Google account. The good news is Odoo supports OAuth authentication which means it plays nicely with Google Apps.

However setting this up can be quite tricky. In this guide I’m going to step you through the process so you can get it working first time.


Note that Google Apps is different to standalone GMail. You must follow each of the steps below in sequence otherwise your authentication process will fail.

There are six main steps:
  1. Enable OAuth authentication support in Odoo
  2. Enable the Google App Engine Admin Console in your Google Apps domain
  3. Create Google Apps OAuth2 access for Odoo
  4. Add Google OAuth2 credentials to Odoo
  5. Create a new Odoo user with Google Apps authentication
  6. Activating Google Apps authentication for new user
Important: Make sure Odoo is correctly configured to send email before starting this. Odoo will need to email an activation link when you enable OAUTH.

So, let’s get started.

Please follow steps for more details

Monday, 23 November 2015

How to clone single branch from the GitHub?

Generally GitHub repository has multiple branch on it. But sometime we don't want to clone whole branch.

This command "git clone git://github/repository.git" will take all branches of its. But we want to only clone "Sub_Branch_2" branch.

For Example:

Main_Branch
        '
        ' - > Sub_Branch_1
       
        '
        ' - > Sub_Branch_2
       
        '
        ' - > Sub_Branch_3
 

This blog will help you for cloning single branch from GitHub.

First we need to check system git version using below command.

git --version

If git version is less than 1.8.x than we must to upgrade git version using below command.

sudo add-apt-repository ppa:pdoes/ppa
sudo apt-get update
sudo apt-get install git
git --version

Afterwards use below command for clone single branch

git clone -b branch_name --single-branch git://github/repository.git

For example:

git clone -b Sub_Branch_2 --single-branch git://github/repository.git

For more details, you may visit Git tutorial

I hope you like this article. Share your views to improve content. Happy Learning !!!

ModuleNotFoundError: No module named 'psycopg2'

  Odoo 18:  Traceback (most recent call last): File "/home/bodedra/odoo18/demo/src/odoo/./odoo-bin", line 5, in ...